


Upgrade Your Airsoft Motor: A Step-by-Step Guide to Replacing the Pinion Gear | JVAN Airsoft Tech Tips

At JVAN Airsoft, we believe in pushing the limits of performance. Whether you're a seasoned player or just starting out, understanding how to maintain and upgrade your airsoft gun is crucial. Today, we're diving into a common but essential upgrade: replacing the motor's pinion gear. A worn-out pinion gear can lead to poor performance, inefficient power transfer, and even damage to your gearbox. The good news? This is a maintenance task you can confidently tackle yourself.
This guide will walk you through replacing your pinion gear—a task we rate as a straightforward 1 out of 10 on the difficulty scale. With the right tools and a careful approach, you can restore your motor's performance efficiently.
Why Replace the Pinion Gear?
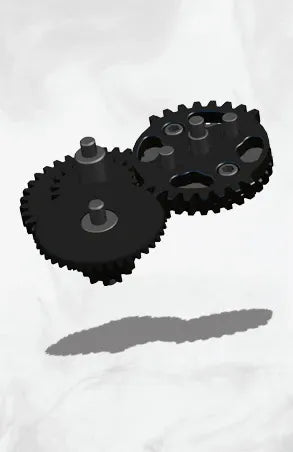
The pinion gear is the small gear located on the top of your motor shaft. It's the first point of contact that transfers the motor's rotational energy to the main gear set inside your gearbox. Over time, this gear can become stripped, worn, or "chewed up," leading to:
-
Grinding noises
-
Loss of power and trigger response
-
Inconsistent firing
-
Further damage to your gearbox internals
Replacing it with a high-quality gear, like the JVAN Airsoft D-Type Motor Pinion Gear, ensures smooth, efficient, and reliable operation.
Tools You Will Need
Gathering the correct tools is the first step to a successful upgrade:
-
Heat Gun: Essential for softening the thread-locker on the grub screw.
-
Ball Peen Hammer: For gently tapping the new gear onto the motor shaft.
-
Needle Nose Pliers: To safely remove the old pinion gear.
-
1.5mm Hex Wrench (Allen Key): For tightening the grub screw. Bonus: Our JVAN Airsoft D-Type Pinion Gear comes with a complimentary high-quality hex wrench, ensuring you have the perfect tool for the job!
Step-by-Step Replacement Guide
Step 1: Removing the Old Pinion Gear
-
Apply Heat: The grub screw that secures the pinion gear is typically secured with a thread-locking compound (like Loctite). Use your heat gun on a high setting to gently heat the gear for about 20-30 seconds. This will soften the thread-locker, making the screw easier to loosen. Be careful, the gear will become hot.
-
Loosen the Grub Screw: Once heated, use the 1.5mm hex wrench to carefully loosen and remove the small grub screw from the side of the pinion gear. Set the screw aside.
-
Remove the Gear: The pinion gear is often a tight press-fit on the motor shaft. Use your needle nose pliers to grip the gear firmly. Gently rock it back and forth along the axis of the shaft until it pops off. Avoid using excessive force that could bend the motor shaft.
Step 2: Installing Your New JVAN Airsoft Pinion Gear
-
Prepare the New Gear: Inspect your new JVAN D-Type Pinion Gear. You'll notice the shaft hole has a flat section. This corresponds to the flat "D-shaped" spot on your motor shaft, which prevents the gear from spinning independently if the grub screw loosens.
-
Slide the Gear On: Align the flat side of the gear's hole with the flat spot on the motor shaft. Slide the new gear on as far as you can by hand.
-
Tapping into Place: If the fit is tight (as it should be for a secure connection), use the ball peen hammer. Gently and lightly tap the top of the gear until the motor shaft is flush with the top of the pinion gear. Ensure the gear is seated straight and firmly.
Step 3: Securing the Grub Screw
This is the most critical step for long-term reliability.
-
Apply Thread-Locker: While some new gears come with pre-applied thread-locker, we always recommend adding a drop of blue (medium-strength) thread-locker to the grub screw. This prevents it from vibrating loose during the motor's high-speed operation.
-
Tighten the Screw: Insert the grub screw back into the hole and use your hex wrench to tighten it securely. Do not over-tighten, as this can strip the small screw threads.
-
Curing Time: If you used thread-locker, allow the motor to sit undisturbed for the recommended curing time (usually 6-24 hours for a full set) before reinstalling it in your gun and using it. This ensures a permanent hold.
Why Choose the JVAN Airsoft D-Type Pinion Gear?
When you choose a component from JVAN Airsoft, you're choosing precision and durability. Our D-Type Pinion Gear is CNC-machined from high-strength steel to exacting tolerances. This guarantees a perfect mesh with your gears, reducing noise and increasing efficiency for a snappier trigger response and overall stronger, faster, and better performance.
We make upgrading easier for you. Every JVAN pinion gear purchase includes a free hex wrench, so you have everything you need to get the job done right.
Ready to upgrade?
Get the reliable pinion gear designed for performance: JVAN Airsoft D-Type Motor Pinion Gear with Free Hex Wrench
Conclusion
Replacing a motor pinion gear is a simple yet highly effective way to maintain your airsoft gun's peak performance. By following this guide and using quality components from JVAN Airsoft, you can ensure your build is reliable on the field. For more tech tips, upgrade guides, and high-performance parts, explore our website and trust JVAN Airsoft to be your partner in airsoft excellence.
Have a great game!
– The JVAN Airsoft Team
Business Development
- Heidi
- JIN WANG METAL(HK) LIMITED
- Whatsapp:+8618103050072
- E-Mail :heidi@hardwareprecision.com